Wood carving is a beautiful and intricate art form that requires skill, patience, and precision. However, even the most experienced wood carvers make mistakes from time to time. Whether it’s a slip of the hand, a misjudgment in design, or a tool that didn’t behave as expected, mistakes are a natural part of the carving process. The good news is that most mistakes in wood carving can be fixed with the right techniques and a steady hand. In this article, we will explore some common mistakes in wood carving and how to rectify them to salvage your work of art.
Identifying the Mistake
The first step in fixing a mistake in wood carving is to identify what went wrong. It’s essential to take a step back and carefully examine the error before deciding on a course of action. Was it a slip of the carving tool that left an unintended mark? Did you carve too deeply into the wood, altering the design? By pinpointing the exact nature of the mistake, you can better determine the best method for correcting it.
Filling in Gaps
One common mistake in wood carving is accidentally creating gaps or holes in the design. Whether it’s a small nick or a larger hole, these imperfections can detract from the overall aesthetic of the piece. To fix gaps in wood carving, you can use wood filler or a mixture of sawdust and glue to fill in the space. Once the filler has dried, carefully sand the area to blend it seamlessly with the surrounding wood. This technique can help conceal mistakes and restore the smooth surface of your carving.
Smoothing Out Rough Spots
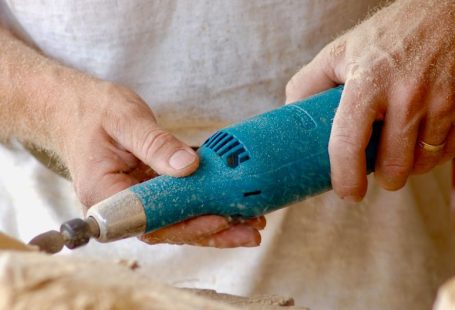
Uneven surfaces and rough spots are another common issue in wood carving. If your carving has rough patches that disrupt the flow of the design, don’t fret – there are ways to smooth them out. One effective method is to use sandpaper of varying grits to gradually sand down the rough areas. Start with a coarser grit to remove the bulk of the imperfection, then gradually move to finer grits for a smoother finish. By patiently sanding and refining the surface, you can achieve a polished look that masks any rough spots in your carving.
Repairing Chipped or Splintered Wood
Chipping or splintering wood is a frustrating mistake that can occur during the carving process. Whether it’s due to using too much force or working with a brittle wood type, these imperfections can compromise the integrity of your carving. To repair chipped or splintered wood, you can carefully glue the wood fragments back together using wood glue. Once the glue has dried, gently sand the area to blend the repair with the surrounding wood. This method can help restore the appearance of the damaged section and salvage your carving.
Adjusting the Design
Sometimes, mistakes in wood carving may require adjusting the original design to accommodate the error. If a particular section of your carving has gone awry, consider modifying the design to incorporate the mistake into the overall composition. For example, if a chip has altered the intended shape of a detail, you can reshape the adjacent areas to create a harmonious new design. Embracing the imperfections and adapting the design can turn a mistake into a unique feature of your carving.
Embracing Imperfections
In the world of wood carving, mistakes are inevitable – but they don’t have to be the end of the road for your project. By approaching mistakes with patience, creativity, and the right techniques, you can fix errors and salvage your carving. Remember, imperfections are a natural part of the carving process and can add character and charm to your finished piece. So, the next time you encounter a mistake in wood carving, don’t despair – see it as an opportunity to showcase your skill and ingenuity in turning a flaw into a work of art.


